|
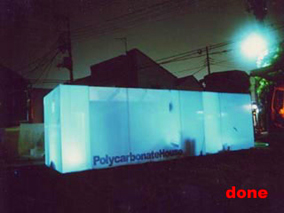
how to build a polycarbonate house.
(16 square meters. kitchen/living, patio, sleeping room, toilet.)
--------
step1:
finding a good occasion.
to do this you need:
1.1 - one week.
1.2 - some nice and collaborative friends.
1.3 - a proper place: an empty lot of convenient size (not too far from a department store that sells everything you may need), with some form of water and electricity supply.
1.4 - some money.
based on our experience,
six people can build, in a week, a very comfortable 16 sqm e polycarbonate house in japan with 3500 us$.
they may find some very kind neighbour who may provide water and electricity, or who may let them borrow some big granite stones (construction site leftovers) for the floor .
in the rest of the world, the price would be probably lower anyway.
--------
step2:
finding the material.
to set up the basic structure of the house, you need at least:
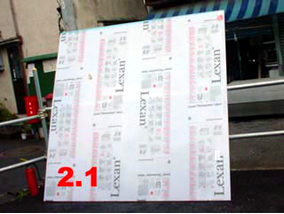
2.1 - 15 alveolar opaque lexan-polycarbonate sheets (size: 200x200cm, thickness: 1cm), for walls and ceiling.
2.2 - stones, for the floor.
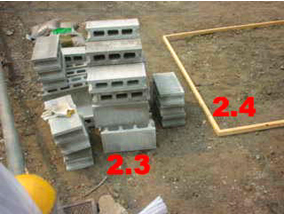
2.3 - concrete blocks, also for the floor
2.4 - thin wood rafters for the foundations.
2.5 - various tools.
please note:
you don't need any structural system to sustain the polycarbonate panels. they can be used freestanding.
that helps to save a lot of money. see step3 to find out how to .

--------
step3:
to build the house.
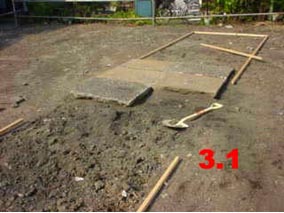
3.1 - lay a floor of stones and concrete blocks on the ground.
3.2 - build a wood frame and just lay it on the ground; this is where the lower side of the wall will attach.

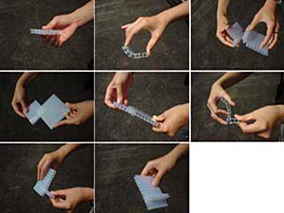
3.3 - prepare all the polycarbonate sheets to be jointed together to form the walls of the house.
3.3.1 - make straight cuts with a manual cutter, along the longitudinal edges of the panels, following the directions of the internal cells.
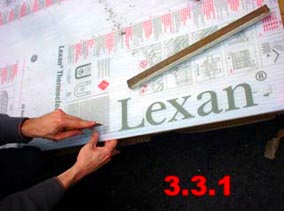
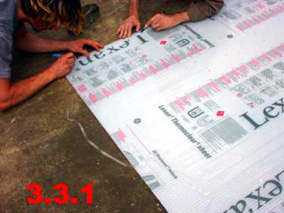
you want to transform the section of the edges of the panels in a male/female joint section. this allows you to join together two panels by their edges, vertically or horizontally, in either an L, I or T junction. junctions made in this fashion will prove quite stiff.
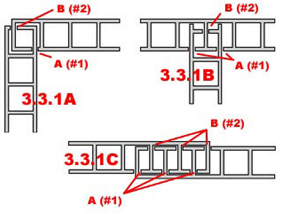
3.3.1A - "L" junction:
make one cut along the edge of panel #1 (sideA) and another along the border pin (point B) of panel #2.
3.3.1B - "T" junction:
make two parallel cuts on side A of the side wall panel #1 and one single cut along the border pin (point B) of the transversal panel #2.
3.3.1C - "I" junction:
make three parallel cuts along the edge of panel #1 (side A) and other three on panel #2 (side B).
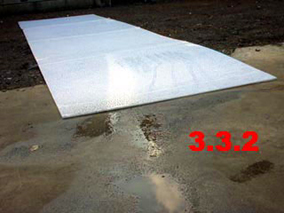
3.3.2 - prepare the side walls, the internal walls and the ceiling by joining the panels together.
(the internal walls will provide the necessary transversal rigidity of the building)
3.3.3 - cut doors and windows where required (but not too many, otherwise you may weaken the structure).
3.4 - start erecting the building: join the polycarbonate walls by sliding them trough their junctions
3.5 - fix them to the wood frame on the ground
3.6 - glue the ceiling to the walls with silicone injections.


by now, the structure of the house is ready!
--------
step4:
refining the house.
once you got the rough builiding up, you can move further:
4.1 - design the details.
in the house we built in tokyo,
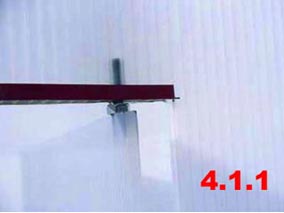
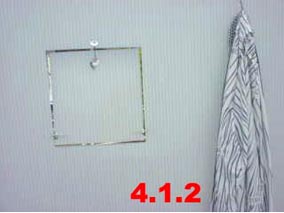
we simply used a couple of bolts as pivots to make doors (4.1.1) and windows (4.1.2) rotate.
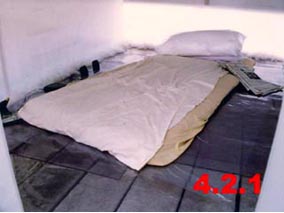
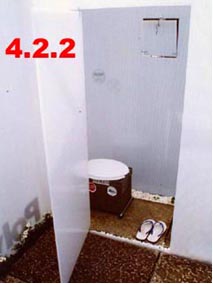
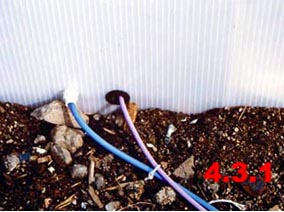
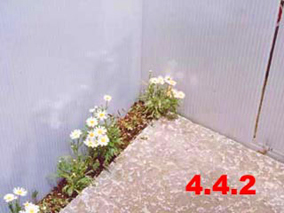
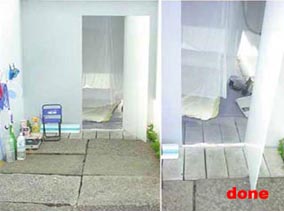
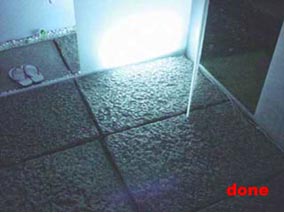
our sleeping room (4.2.1) was a futon bed laid upon a thick transparent plastic carpet, under a hanging mosquito net. we placed a toilet and a shower in the bathroom (4.2.2), and a little camp kitchen in the covered corner of the living room (4.2.3). we had water and electricity (4.3.1) coming from the neighbour's house through two colourful lines, a little orchard (4.4.1) along the kitchen wall, and some flowers (4.4.2) in the gravel here and there.
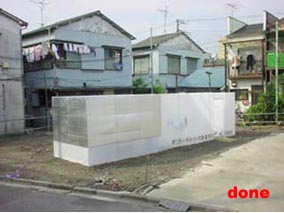
here we go,
the house is almost ready now....


--------
step5:
under the sun and the rain.
according to the place where you are building the house,
you'd better take some necessary precautions:
5.1 - if you think that the temperature inside will rise too high under the sun,
place some kind of sunshading device around the polycarbonate envelope.
5.2 - if you think that the indoor air circulation will not be enough,
make some grills for air inlet and outlet on the panels: cut some parallel vertical openings following the internal structure of the panels themselves. from a grill placed low near the floor level, fresh air will flow in; from a grill placed up near the ceiling level, hot air will flow out.
a grill made by 20 parallel vertical slots , each of them 30 cm high approx., is a reasonable solution to let air flow in and out without weakening the structure of the polycarbonate panel.
5.3 - if you think that the horizontal roof of the sleeping room will not bear the load of rain,
just punch a hole in the middle of the ceiling and drain the rain down by a little flexible pipe that makes its way out through the side wall.
5.4 - if you think that the wind and the rain will bring down the house,
cut some pieces of polycarbonate out from the leftovers, and place them transversally, as stiffening beams.
now your house is safe...
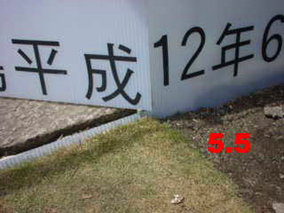
5.5 - one more little thing that you can do, if you like,
is to add some graphic element on the external walls.
--------
step6:
invite your friends.
the house is finished.
6.1 - bring your favourite pieces of furniture, books, radio, computer, cdplayer, whateever you want.
6.2 - bring your friends to see your brand new beautiful polycarbonate kingdom.
and enjoy it!
brigata tognazzi:
----------------------------------------
> walter a.aprile (italy)
> anna barbara (italy)
> rachaporn choochuey (thailand)
> stefano mirti (italy)
> akihiro otsuka (japan)
> luca poncellini (italy)
> andrea volpe (italy)|
|
|
Disclaimer:
Religious and political views expressed on this site are those only of the invited author/s, they do not represent or bare claim to views or opinions of e-flux.com. Executing any of the instructions on this website is entirely at your own risk.
Conditions:
Should you decide to make this instruction, please send us a picture,
your name and the instruction's reference number, and it will probably be added to this page.
Credits:
DO IT is a project curated by Hans-Ulrich Obrist. / DO IT at E-flux is produced and presented by
electronic flux corp.
that holds all the publishing rights, copyrights are held by the respective authors. / Architecture, Design and Development by
FDTdesign, NY.
|